Creating Brushes to Fit Your Needs
This chapter we will look at complex brushes, and how they can fit into your map
- The Ground
a) Our first step will be to make a new world. Since we 'll be doing a bigger world than before, lets save it as “Big1”. Create it just as you did in the last chapter.
b) Also, we will want an appropriate texture for our floor. Go to the Textures drop down list and select any texture you want to use, you can also click the Browse button, and enter a key word, such as out, and chose a texture from that.
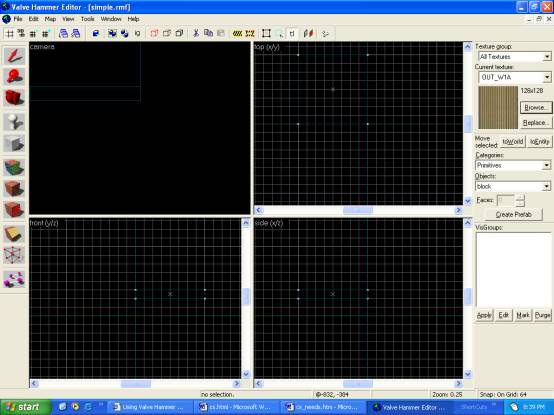
c) After you chose your Texture go to the Top view port (the upper right one). Look in the Status Bar for the Grid box, which shows the size of the grid blocks in the current window. Make sure that it says Grid: 64, indicating a grid block size of 64 units.
Tip: The Grid is a way of organizing the placement of objects, similar to a ruler. It keeps you from laying out points totally at random and it allows you to measure the size of the objects you’re creating and their relative positions, using the grid makes for much more efficient level layout.
When you build to the grid using standard units, your walls are more likely to line up properly and others can more easily understand your level just by looking at it, which is if you chose to make the world, public at a later stage.
If your grid setting shows something other than 64, you 'll want to adjust the grid scaling. First, single click in the Top view port to make sure that the focus is in that port. Then, either uses the Expand /Shrink Grid toolbar buttons or the OPEN SQUARE BRAKET ([) and CLOSE SQUARE BRACKET (]) keys on the keyboard to scale the grid up or down until it’s at 64 units.
While 64 units is a reasonable grid block size for laying out floors, walls and ceilings in indoor spaces, if you were working on a large, open outdoor level, 256 units might be a more manageable grid scale. Your goal is always to use a large enough grid to allow you to tell how big your current brush is going to be, but still small enough to create whatever detail you 're going to create.
You 'll want a floor that 's about 512 units per side. That means you 'll want to make a square that 's eight grid squares on a side. Create one now, and you should get a brush that looks like this:
2. The Tower
Now that you have a floor, the next step will be to use hammer to make complex brushes, beyond the simple squares that you've used so far, you will also learn tips and techniques for good brush construction.
The simplest technique is to use hammers clip brush tool to build a brush that is close to what you want. While this tool doesn't make it possible to instantly create anything, it speeds things up a lot, and makes your map have fewer bugs compared to vertex editing.
a) For the next step, select a new texture, though inshore it’s different enough from the floor texture to make a good contrast.
b) Then, go into one of the horizontal views (Left or Front viewpoints).
c) Make a block so that it raises 4 grid squares above the floor. Your block is now 256 units tall, and is about the right height for a tall and imposing support structure.
d) Now, switch back to the Top view.
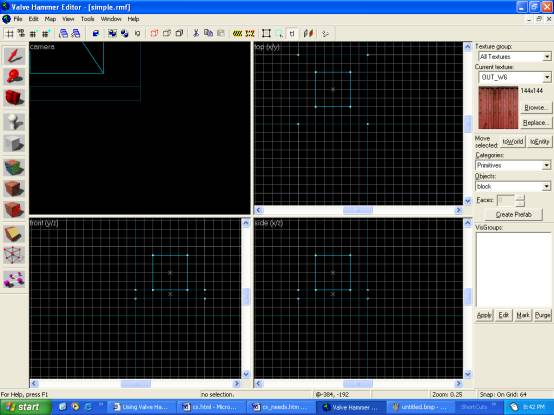
e) In the top view make your block 4 units wide so that it sits in the centre of the map. Now you have a box the next step is to click the Clip tool.
The clip tool is a magical piece of mapping tool work, as you can use it to make cliffs like in militia, or to make a simple ramp like in dust. This time we are going to use it to clip of the corners of a brush, to make it look like a support, or a smoke stack.
Once you have done the above, your editor window should look like this:
- The Clip Phase
Now we can hack that tower block. Lets start.
a) Make the block active with the selection tool
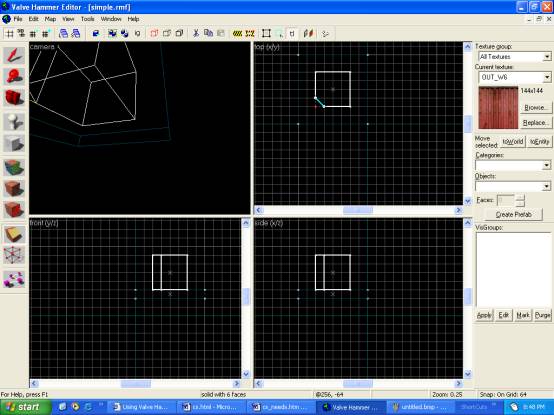
b) Now make the clip tool active, click any where on the grid, and the block will have thick white lines around its outside. As show to the below:

c) Now click and drag, and you will have 2 small round handles
d) Click one of them and a line it 1 grid marker from the edge.
e) Click the second one, and align it as show below. The area that is shaded in, in the white lines is what stays, the area that is show in the red, is what is chopped away.
f) To make the clip, right click, and chose "clip Object” or just press enter.
TIP: Pressing enter stops possible movement with the mouse, making your clip sloppy.
Do this to the other 4 sides, to make the result look like the screen shot at the end of the page.
This is an example of an object that can be created quickly, and cleanly using Hammer but would require several steps in most other editors. However, the ability to create brushes this way does allow you to create brushes that hammer and Half Life cannot properly use in games - as some times you clip a wired angle, and the block, becomes concave, stooping your compile from working past that point.

![]()