Knowing what to put into a map to make it work
Now we reach the step where we put the things in the map needed to make it work. It 's only 5 things. Real simple.
- Lets add a Light
Let 's start with the first -a light, Can 't really play if you can 't see anything. The light is an entity in hammer.
a) Click the entity tool or use the hot key shift + e.
b) Left click the middle of your room with the entity pointer. Move it around if need be, until the entity box is near the top centre of your hollow box. You may have to zoom in a bit to see what you are doing (magnifying tool -left click to zoom in, right click to zoom out).
c) When the entity box is where you want it, place your cursor (with the entity tool still selected) and right click it. Select 'create object', or press enter.
d) Now you have an entity in your box. But, most likely, it 's not a light, unless you selected that as the default entity to use when setting up Hammer.
e) Click the selection tool. Highlight the entity box by left clicking it. It will turn red. You may have to zoom in to select it. Left click any blank area to de-select something if you 've selected it by accident. Now that you have the entity box highlighted, right click the little purple entity box, and select properties, or use the hot key alt + enter, from the menu that comes up. This will give you a fascinating dialog box that looks like this:
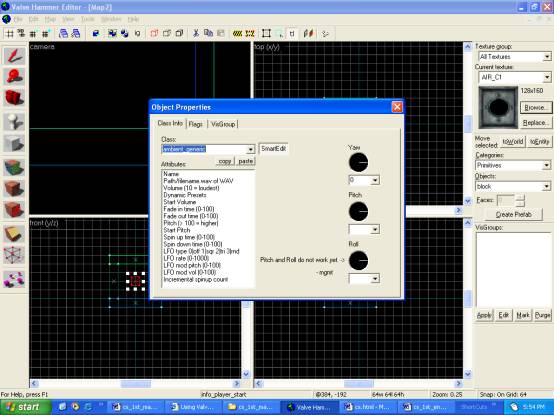
f) In the top pull down menu, scroll down until you see an item labelled 'light '. Select that. It will have a few options that come with it -target, name, etc.
g) The one we want is 'brightness ' Click on that, and the value box to the right of it will show 4 sets of numbers that look like this '255 255 128 200'. The first three control the colour, in hexadecimal format. The last one controls the brightness. Change it to 900, as we want a pretty bright light for this level, as it will be the only light we are going to have. Close the dialog box. Now you have your light.
- Lets Add Spawn
Next, we put in a CT and a T spawn point. A spawn point is where you start at the beginning of a round. CT /T spawn points are also entities in Hammer.
a) Click the entity tool again.
b) Place two entities on the bottom of your cube, on opposite sides.
c) Go through the same steps as we did for the light, but instead of selecting 'light ' in the properties box, select "INFO_PLAYER_START " for a CT spawn point, and "INFO_PLAYER_DEATHMATCH" for a T spawn point. This confused the heck out of me at first.
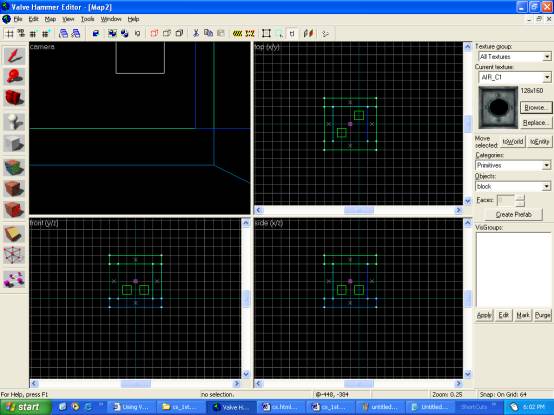
Your map should look like this now:
- Want to Buy some Guns? Time to add some buy zones…
Now you have your spawn points, place some buy zones next to them
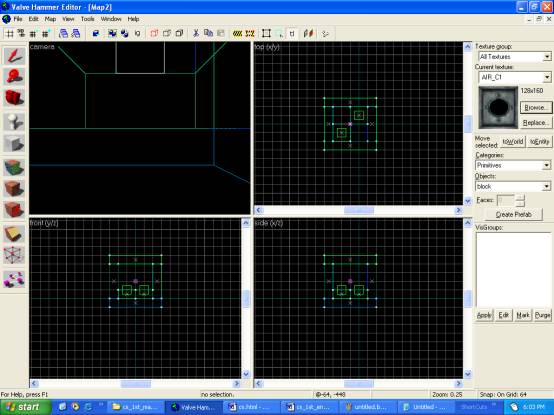
a) Start by making a brush inside the hollow cube does this. Make a short rectangle near one of the spawn points, like so:
b) Don 't worry if it encloses the spawn point -it 's not going to be solid for long here.
c) Highlight it with the selection tool.
d) Right click it, and select "Tie to Entity", or in the entities list, click "to Entity"
e) On the resulting menu. Select "FUNC_BUYZONE" in the resulting properties box.
f) Close the properties box. Congratulations. You have a buy zone. Repeat one more time for the T spawn point.
Buy zones are not needed in all maps, but they offer control on how far a player can wonder and still get guns. Its stupid that a team has an advantage in a battle zone, because of the spawn zone being close by, and the buy zone leaking through the wall. I remember in de_dust2, that you could get guns, if you where CT, next to the crate above the CT spawn zone.
- Lets Play!
Now you have your room, a light, a CT & T spawn point, and two buy zones. Let the compiling begin.
a) Click file, then save, to save the map, as compiles only work of saved work.
b) Then Hit F9. This will bring up the compile dialog box.
c) Click advanced, in the drop down list on the top left.
d) Chose counter strike full and you should have something that looks like this:

e) Now you just need to click go, or press enter, the compile will take up to 30 min (maybe more) depending on the computer system you are running. It might look like hammer has locked up, but don 't shut it down. The compile tools are hungry for CPU power, and screen refreshing in hammer is the last thing they want your computer to do.
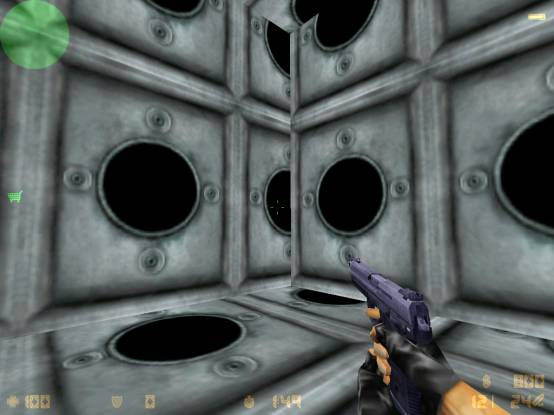
f) Hopefully everything will compile correctly, and Counter Strike will start up, and your new map will load smoothly. It should look something like this:
![]()